Gardening
How to Grow Basil and Kale Together (Companion Planting)

Companion planting is the practice of growing two or more plants together for mutual benefit. When done correctly, companion planting can improve the growth and health of your plants, as well as deter pests and improve the soil.
One great example of companion planting is pairing basil and kale together. Basil is a fragrant herb that deters pests, while kale is a hardy green that improves the soil quality. Together, they make a great team!
What Is Companion Planting?
Companion planting is the art of growing two or more plants nearby for mutual advantage. Companion planting can help your plants grow and thrive, prevent pests and enhance the soil quality.
There are many benefits to companion planting, including:
- Improved growth: Companion planting can help plants grow better by providing them with the nutrients they need. For example, nitrogen-fixing plants like legumes can help improve the soil quality for other plants.
- Deterrent to pests: Some plants release chemicals that deter pests. By companion planting these plants with others, you can help protect your crops from insect damage.
- Improved soil quality: Companion planting can also help improve the soil quality by adding organic matter and improving drainage.
What Are Basil and Kale?
Basil (Ocimum basilicum) is a fragrant herb that is commonly used in cooking. It is a member of the mint family and has a wide variety of medicinal uses.
Kale (Brassica oleracea) is a hardy green that is often used in salads or as a cooked vegetable. Kale is high in vitamins A, C, and K and contains calcium and iron.
Basil and kale are both easy to grow and make great companion plants!
The Benefits of Companion Planting Basil and Kale
For a good reason, basil and kale are two of the most popular leafy greens. Not only are they both packed with vitamins and minerals, but they also have a delicious flavor that can enhance any dish.
Related Post: Are Galvanized Raised Garden Beds Safe to Use? (Answered)
But did you know that these two greens also make great companions? That’s right, companion planting basil and kale can offer many benefits, including improved growth, bigger harvests, and even pest control.
So, companion planting is definitely worth considering if you’re looking for a way to get the most out of your basil and kale plants. Here’s everything you need to know about how to grow basil and kale together.
How to Grow Basil and Kale Together
Basil and kale are two of the most popular vegetables to grow in the home garden. Both are relatively easy to grow and offer a delicious, healthy addition to any meal. But did you know that these two plants can actually be beneficial to each other when grown together?
Companion planting, a technique that has been used for centuries, is the practice of growing different plant species together in order to maximize their growth potential and minimize pests and diseases. When done correctly, companion planting can lead to a more bountiful and healthier garden.
So, why not give it a try with your basil and kale? Here are a few tips on how to get started:
Choose the right location
Basil and kale both prefer full sun, so choose a spot in your garden that gets at least 6 hours of direct sunlight each day.
Prepare the soil
Both plants prefer well-drained soil that is rich in organic matter. Before planting, mix in some compost or aged manure to help improve the drainage and nutrient content of the soil.
Sow the seeds
Basil seeds can be sown directly in the ground, but kale seeds will need to be started indoors in seed trays or pots. Once they have germinated, transplant the seedlings into the garden bed.
Water regularly
Keep the soil moist but not waterlogged, as this can lead to root rot. Water in the morning so that the plants have time to dry off before nightfall.
Fertilize annually
Apply a balanced fertilizer such as 10-10-10 in early spring, just before new growth begins.
Harvest often
Both basil and kale are best when used fresh, so harvest leaves regularly throughout the growing season. Use pruning shears to cut individual leaves or the entire plant back by a few inches to encourage new growth.
Store properly
Basil leaves can be stored in the fridge for up to a week, while kale will keep for up to two weeks. To store longer, wash and dry the leaves then place them in airtight bags or containers in the fridge. We’ll go into more depth later on about storing your greens.
Related Post: Can I Use Miracle Gro Garden Soil in Pots? (Answered)
When Are Basil and Kale Ready to Harvest?
Basil and kale are typically ready to harvest 60-90 days after planting. However, you can start harvesting leaves as early as 30 days for basil and 45 days for kale.
To determine if your greens are ready to harvest, simply check the size of the leaves. For example, basil leaves should be about 2-3 inches long, while kale leaves can be 3-4 inches long or larger.
If you want to use the entire plant, wait until it has reached its full size before harvesting. For basil, this is typically 12-18 inches tall. For kale, 18-24 inches tall.
Once you’ve harvested your greens, it’s important to store them properly to ensure they remain fresh and delicious.
Harvesting Tips for Both Basil and Kale
As we mentioned earlier, both basil and kale are best when used fresh. That means harvesting the leaves on a regular basis throughout the growing season.
The best time to pick is in the morning. This is when the greens are the freshest and have the most moisture.
To harvest, simply cut the leaves from the plant using pruning shears. For basil, you can either cut individual leaves or snip off the entire plant about 2-3 inches above ground level. This will encourage new growth and provide you with a second harvest later in the season.
Kale can be harvested in a similar way, although you may want to wait until the leaves are a bit larger before cutting. If you want to use the entire plant, wait until it has reached its full size (18-24 inches tall) before harvesting.
How to Store Basil and Kale
Once you’ve harvested your greens, it’s important to store them properly to ensure they remain fresh and delicious.
Basil leaves can be stored in the fridge for up to a week, while kale will keep for up to two weeks. To store longer, wash and dry the leaves then place them in airtight bags or containers in the fridge.
You can also preserve basil and kale by freezing or drying them. To freeze, wash and dry the leaves and place them in freezer bags. Frozen greens will last for several months.
Related Post: Do Plants Grow Better in Soil or Sand? (Explained for Beginners)
To dry, Hang the plants upside down in a dark, well-ventilated space until the leaves are crisp. Once dry, crumble the leaves and store them in an airtight container. Dried basil and kale can be used in soups, stews, and other cooked dishes.
As you can see, there are many ways to enjoy these delicious greens, whether you grow them yourself or buy them from the store. So get out there and start planting!
Tips for Success on How to Care for Basil and Kale
Basil (Ocimum basilicum) and kale (Brassica oleracea) are two of the most popular plants in home gardens. They are also two of the easiest plants to grow together. Companion planting is a great way to get the most out of your garden space and maximize your plant yield.
Here are some tips on how to care for basil and kale when grown together:
- Choose a sunny location for your garden bed. Both basil and kale prefer full sun exposure.
- Amend the soil with organic matter before planting. This will help improve drainage and increase nutrient availability for your plants.
- Plant kale first, as it is a slower-growing plant than basil. Sow the seeds directly in the garden bed, or start them indoors and transplant them later.
- When planting basil, sow the seeds directly in the garden bed, start them indoors, and transplant them later.
- Water both plants regularly, keeping the soil evenly moist but not soggy.
- Fertilize kale every few weeks with a balanced liquid fertilizer. Basil does not need to be fertilized as often, but you can give it a light feeding of compost tea or fish emulsion once a month.
- Keep an eye out for pests and diseases. Aphids, whiteflies, and slugs are common pests that can attack both plants. In addition, downy mildew is a disease that can affect both basil and kale.
- Harvest kale when the leaves are 6-8 inches long. You can cut the entire plant down to 2-3 inches above ground level or selectively harvest individual leaves as needed.
- Basil is ready to harvest when the leaves are big enough to use. You can snip off individual leaves as needed or cut the entire plant back by half its height to encourage bushier growth.

Lipton Hot Tea has long been synonymous with comfort, warmth, and relaxation. From its humble beginnings to its global presence today, Lipton has remained a staple in households around the world. This article explores the rich history, diverse varieties, health benefits, and cultural significance of Lipton Hot Tea.
Introduction to Lipton Hot Tea
Lipton Hot Tea, produced by the renowned brand Lipton, offers a delightful range of flavors and blends to suit every palate. Whether enjoyed as a morning pick-me-up, a midday refreshment, or a soothing beverage before bedtime, Lipton Hot Tea has become a cherished part of daily rituals for millions.
History and Background of Lipton
The story of Lipton Hot Tea dates back to the late 19th century when Sir Thomas Lipton established his tea empire. With a vision to make quality tea accessible to all, Lipton revolutionized the tea industry by offering affordable yet superior teas to consumers.
Varieties of Lipton Hot Tea
Lipton Hot Tea boasts a diverse range of offerings, including Classic Black Tea, Green Tea, and Herbal Infusions. Each variety is carefully crafted to deliver a unique flavor profile and aroma, satisfying tea enthusiasts worldwide.
Classic Black Tea
Lipton’s Classic Black Tea is a timeless favorite, known for its robust flavor and invigorating qualities. Sourced from the finest tea gardens, this tea offers a bold and satisfying brew that can be enjoyed at any time of the day.
Green Tea
Renowned for its health benefits and delicate taste, Lipton’s Green Tea is a popular choice among health-conscious consumers. Packed with antioxidants and nutrients, green tea provides a refreshing and revitalizing experience with every sip.
Herbal Infusions
Lipton’s Herbal Infusions blend natural herbs and spices to create soothing and aromatic teas. From calming chamomile to invigorating peppermint, these herbal blends offer a caffeine-free alternative for relaxation and wellness.
Health Benefits of Liptons Hot Tea
Beyond its delightful taste, Lipton Hot Tea offers numerous health benefits. Rich in antioxidants, vitamins, and minerals, tea consumption has been linked to various wellness advantages, including:
- Antioxidant Properties: Liptons Hot Tea contains antioxidants such as catechins and flavonoids, which help protect the body from oxidative stress and inflammation.
- Boosting Immune System: The natural compounds found in tea may support immune function, helping the body defend against infections and illnesses.
- Improving Heart Health: Regular consumption of tea has been associated with lower risk factors for heart disease, including reduced cholesterol levels and improved blood vessel function.
How to Prepare Liptons Hot Tea
Preparing Liptons Hot Tea is a simple and enjoyable process, whether using traditional brewing methods or opting for convenient instant tea options.
Traditional Brewing Method
To brew a perfect cup of Liptons Hot Tea, start by boiling fresh water and pouring it over a tea bag in your favorite mug. Allow the tea to steep for 3-5 minutes, depending on your desired strength, then remove the tea bag and enjoy!
Instant Tea Preparation
For a quick and easy alternative, Lipton offers instant tea powders and tea bags that can be simply mix with hot water for instant gratification. Perfect for busy mornings or on-the-go refreshment, instant tea provides the same great taste without the wait.
Liptons Hot Tea and Sustainability Efforts
As a responsible tea producer, Lipton is committed to sustainability practices that protect the environment and support local communities. From responsible sourcing to waste reduction initiatives. Lipton strives to minimize its ecological footprint and promote a more sustainable future for tea cultivation.
Liptons Hot Tea and Community Impact
Through partnerships and initiatives, Lipton actively engages with tea-growing communities to improve livelihoods, education, and healthcare. By empowering farmers and investing in community development projects. Lipton aims to create positive change and foster sustainable growth in tea-producing regions.
Liptons Hot Tea: A Versatile Beverage
Whether enjoyed hot or cold, plain or flavored. Liptons Hot Tea offers endless versatility to suit every taste preference and occasion. From classic Earl Grey to exotic fruit blends, there’s a Lipton tea for every mood and moment.
Popular Flavors and Blends of Liptons Hot Tea
Lipton’s extensive range of flavors and blends caters to a diverse audience, with popular choices including:
- Earl Grey: A classic blend of black tea with bergamot flavoring, Earl Grey offers a fragrant and sophisticated taste experience.
- Lemon Ginger: Combining zesty lemon with warming ginger, this herbal infusion is perfect for soothing the senses and aiding digestion.
- Mint Green Tea: Refreshing and invigorating, mint green tea combines the crispness of green tea with the coolness of mint for a revitalizing beverage.
Lipton Hot Tea: A Beverage for All Seasons
While often associated with cozy winter evenings, Lipton Hot Tea is enjoy year-round, offering comfort and hydration in every season. Whether served steaming hot in winter or over ice in summer, Lipton tea provides a refreshing and satisfying beverage experience.
Enjoying Lipton Hot Tea Around the World
From bustling cities to remote villages, Lipton Hot Tea has transcended borders and cultures, becoming a beloved beverage enjoyed by people around the world. Whether shared among friends, savored alone, or incorporated into cultural traditions. Lipton tea unites people in moments of warmth and connection.

Seed scarification is the process of breaking down the seed coat so that water can more easily penetrate and the seed can germinate. There are many benefits to scarifying seeds, including:
- Increased germination rates: Scarified seeds have a much higher chance of germinating than non-scarified seeds.
- Faster germination: Scarified seeds will often germinate faster than non-scarified seeds.
- Better plant establishment: Seedlings that emerge from scarified seeds tend to be healthier and more vigorous, leading to better establishment in the landscape.
- More uniform emergence: When all of the seeds in a population have been scarified, they will tend to germinate more uniformly, resulting in a more even stand of plants.
- Better weed control: One of the benefits of better plant establishment is that it can help reduce weeds. Weeds are often competitive with young seedlings for resources like water and light, so if the seedlings are stronger and healthier, they are less likely to be outcompeted by weeds.
Several methods can be used to scarify seeds, including mechanical abrasion, chemical treatment, or exposure to fire or smoke. The best method will depend on the type of seed being scarified and the desired results.
Related Post: Should You Add Worms to Your Raised Garden Bed? (Answered)
Seed scarification is an essential step in the seed-starting process for many plants.
By scarifying the seeds, you can improve germination rates, speed up germination times, and establish more robust seedlings.
This ultimately leads to better plant establishment and more uniform growth in the landscape.
How Do You Scarify Seeds?
There are several ways that you can scarify your seeds. One popular method is to nick the seed coat with a sharp knife. Another option is to file the seed coat with a piece of sandpaper.
You can also pre-treat your seeds by soaking them in a weak acid solution for 24 hours. After pre-treating, rinse the seeds well and plant them as usual.
If you’re having trouble germinating your seeds, scarifying them may help. This simple process can give the seedling the boost to break through the tough seed coat and start growing.
Overall, the best seed scarification method will be determined on a case-by-case basis.
Different seeds have different thicknesses of seed coats. Some may need a simple nick with a knife, while others will require more aggressive treatment like sanding or soaking in acid.
If you’re unsure how to scarify your particular seeds, many resources are available online and in gardening books.
With a little research, you should be able to find the best method for your needs.
The Different Methods of Seed Scarification
As discussed, you can scarify your seeds in a few different ways.
The most common method is to use sandpaper or a file to rough up the seed coat. However, you can also nick the seed coat with a knife or scissors.
Another option is to soak the seeds in an acidic solution, like vinegar or lemon juice.
Finally, you can scarify seeds by subjecting them to extreme temperature changes, like freezing them and then thawing them out.
Seed scarification is important because it helps the seed to break out of its hard shell.
This allows the seed to germinate and grow into a new plant. Scarifying seeds can also help speed up the germination process.
Which Method Is the Best for You?
Now that you know all about seed scarification, it’s time to choose a method. Here’s a look at some of the most popular methods to help you decide which one is best for you.
Related Post: How to Place a Raised Garden Bed on Concrete (Answered)
Soaking Seeds in Water
If you have particularly hard seeds, soaking them in water overnight can help soften the shells. This is one of the simplest methods of seed scarification and all you need is a bowl of water and some time.
Sanding or Filing Seeds
If you have smaller seeds, sanding or filing them can be an effective way to break through the tough outer shell. You can use a file, sandpaper, or even a nail file to scarify your seeds.
Cracking Seeds
Cracking your seeds is another popular method of seed scarification. You can use a hammer, a mallet, or even a rock to crack the shells of your seeds. Just be careful not to crush the seeds themselves in the process.
Acid Treatment
If you have particularly hard-to-germinate seeds, you may want to try an acid treatment. This involves soaking your seeds in a weak acid solution for 24 hours. Afterward, rinse the seeds well with water and plant them as usual.
Heat Treatment
You can also use heat to scarify your seeds. This can be done by holding the seeds over a flame or by using a soldering iron. Just be careful not to overdo it, as you don’t want to damage the seeds.
Ultimately the method you choose will be based on the seed you’re working with and your personal preferences.
Experiment with different methods to find the one that works best for you.
How to Care for Your Plants After Scarifying Their Seeds
Seed scarification is the process of breaking down the seed coat so that water can enter and the embryo can begin to grow.
There are a few different ways to do this, but the most common is to nick the seed coat with a sharp knife or sandpaper. This can be done before planting or after soaking the seeds in water overnight.
Once you have scarified your seeds, it is crucial to give them proper care so they will germinate and grow into healthy plants. Here are a few tips on how to care for your plants after scarifying their seeds:
- Water them regularly. Seeds need moisture to germinate, so water them every day or two until they sprout.
- Keep them warm. Most seeds germinate best at warm temperatures, so place them in a warm spot or use a seed-starting heat mat.
- Provide good drainage. Seeds should be planted in well-draining soil so they don’t sit in water and rot.
- Give them light. Once they sprout, seedlings need light to grow strong and healthy. Place them under grow lights or near a sunny window.
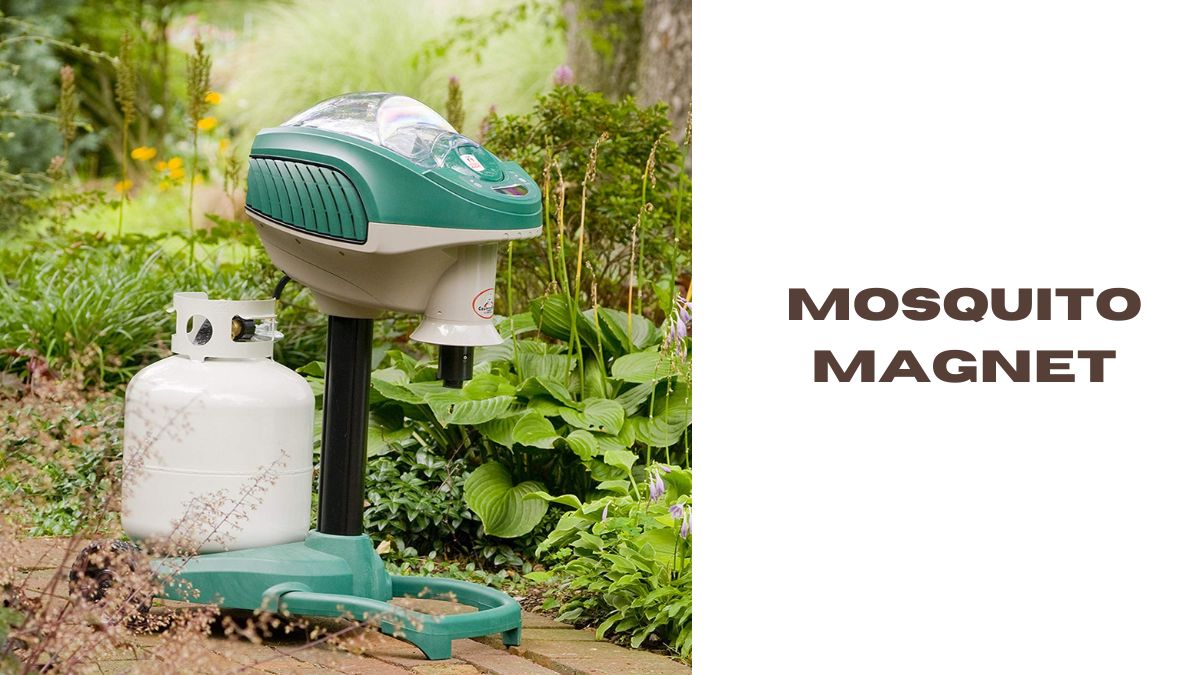
Mosquitoes, the bane of summer evenings and outdoor gatherings, are not just annoying; they can also transmit diseases like malaria, dengue fever, and Zika virus. Traditional methods of mosquito control, such as repellents and insecticides, have limitations and may not offer comprehensive protection. However, innovative solutions like the Mosquito Magnet have emerged as effective alternatives.
How Mosquito Magnets Work
Mosquito Magnets utilize a combination of attractants, such as carbon dioxide, heat, and moisture, to lure mosquitoes into the device. Once inside, the mosquitoes are vacuumed into a net where they dehydrate and perish. This process mimics the natural cues that mosquitoes use to locate their hosts, making the Mosquito Magnet highly effective.
Benefits of Using a Mosquito Magnet
- Reduction of Mosquito Population: By targeting and capturing egg-laying females, Mosquito Magnets help to break the breeding cycle, leading to a significant reduction in mosquito populations.
- Environmentally Friendly: Unlike chemical-based insecticides, Mosquito Magnets do not harm beneficial insects or contaminate the environment.
- Safe for Humans and Pets: Mosquito Magnets pose no threat to humans or pets, making them a safe option for outdoor use.
Types of Mosquito Magnets
There are two main types of Mosquito Magnets: propane and electric. Propane Mosquito Traps use propane to generate heat and carbon dioxide, while Electric Mosquito Traps rely on electricity to power fans and emit attractants.
Factors to Consider When Choosing a Mosquito Magnet
When selecting a Mosquito Magnet, several factors should be taken into account, including coverage area, power source, and maintenance requirements. Larger outdoor spaces may require a high-capacity model, while smaller yards may benefit from a compact unit.
Setting Up a Mosquito Magnet
Proper placement is crucial for the effectiveness of a Mosquito Magnet. It should be positioned in a shaded area away from competing sources of carbon dioxide, such as grills or propane tanks. Assembly is typically straightforward, requiring minimal tools and expertise. Regular maintenance, including emptying the catch net and replacing attractants, is essential for optimal performance.
Effectiveness of Mosquito Magnets
Numerous studies have demonstrated the efficacy of Mosquito Magnets in reducing mosquito populations. Additionally, glowing customer reviews attest to their effectiveness in providing relief from mosquito bites and creating a more enjoyable outdoor environment.
Tips for Maximizing Mosquito Magnet Effectiveness
To maximize the effectiveness of a Mosquito Magnet, proper placement is key. It should be positioned downwind from areas where mosquitoes are likely to breed, such as standing water or dense vegetation. Regular maintenance, including cleaning and servicing the device, will ensure consistent performance. Using attractants like octenol or lactic acid can enhance the lure and capture rate of the Mosquito Magnet.
Common Misconceptions About Mosquito Magnets
Despite their effectiveness, there are some common misconceptions about Mosquito Magnets. One misconception is that they attract more mosquitoes to an area. In reality, Mosquito Magnets target and capture mosquitoes that are already present, reducing overall mosquito populations. Another misconception is that they are only effective in certain environments. While environmental factors may influence effectiveness, Mosquito Magnets can be beneficial in a wide range of settings.
Conclusion
Mosquito Magnets offer an innovative and effective solution for controlling mosquito populations and reducing the risk of mosquito-borne diseases. By mimicking the natural cues that attract mosquitoes, these devices provide a safe and environmentally friendly alternative to traditional insecticides. With proper placement and maintenance, Mosquito Magnets can create a more enjoyable outdoor experience for homeowners and outdoor enthusiasts alike.
-

 Gardening2 months ago
How to Keep Squirrels Away with Coffee Grounds (Answered)
-

 Gardening2 months ago
10 Surprising Facts About Greenhouses (How Do Greenhouses Work?)
-

 Backyard2 months ago
Should You Remove Pine Needles from Under a Tree? (Answered)
-

 Gardening2 months ago
How to Save a Dying Corn Plant (Answered with Tips!)
-

 Gardening2 months ago
How to Use Pine Shavings as Garden Mulch (Answered)
-

 Gardening2 months ago
Tips for Growing Tomatoes in Clay Soil (Important Facts!)
-

 Gardening2 months ago
How to Get Rid of Bugs in Your Bagged Soil (Answered)
-

 Backyard2 months ago
Can You Put Dry Wood Through a Wood Chipper? (Explained)